Saturday, March 31, 2007

Salmon Blobs with Bell Pepper Sauce

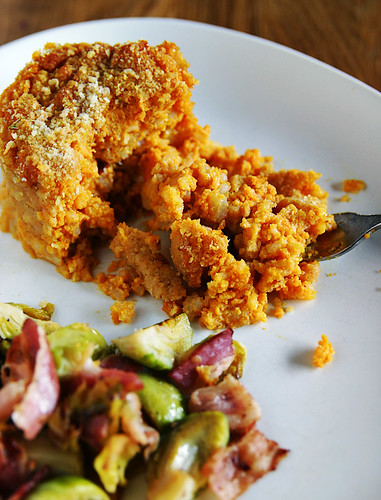
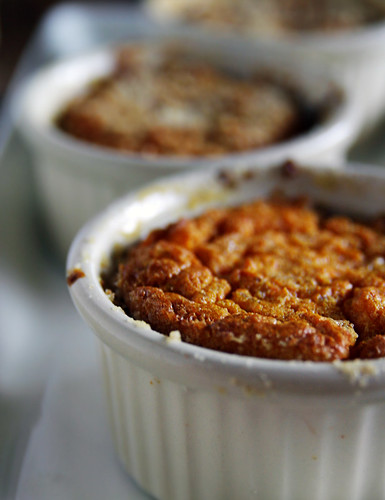
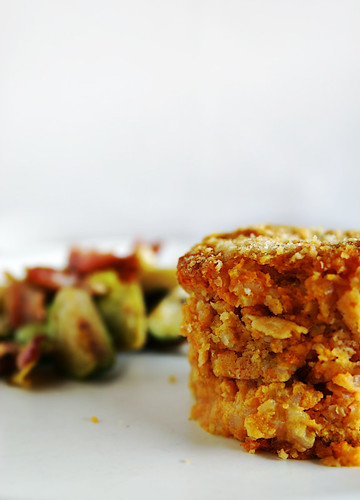
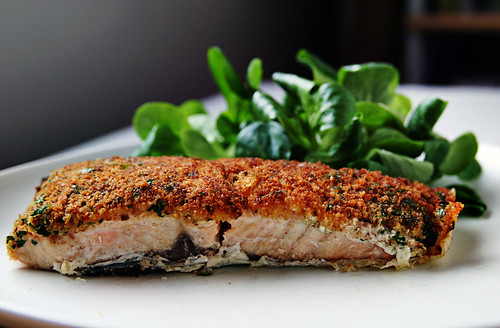
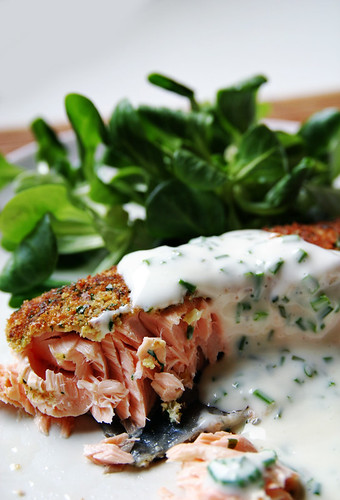
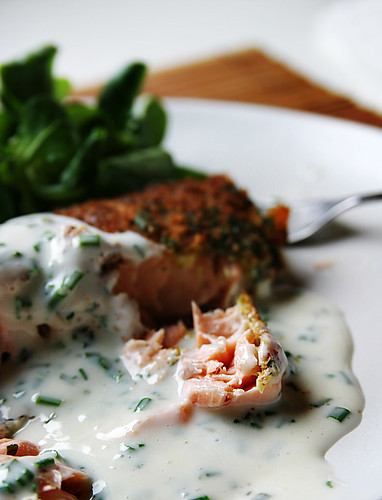
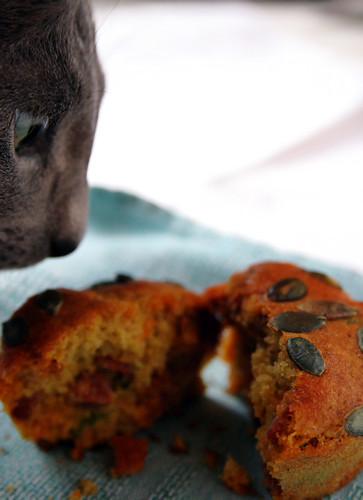
Such an attractive appellation, don't you think? I happen to be a staunch proponent of truth in advertising, and the original recipe called these "Salmon Bacon Balls" - which is just a dirty dirty lie on several levels: there's no bacon, just crisp-fried strips of cold-smoked salmon, nor could I come up with a way of forming actual balls from a batter that was just this side of runny. To make matters worse, this post could also be called When Bad Photos Happen to Good Dishes. Sometimes things just don't work out the way you planned, especially the first time around.

Salmon Blobs

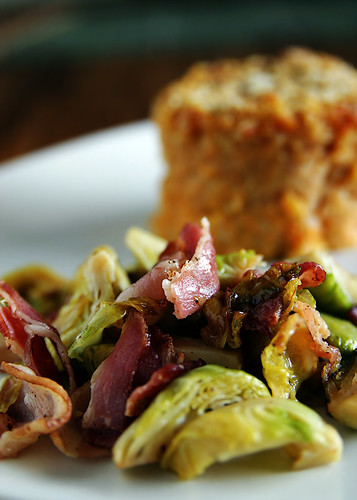
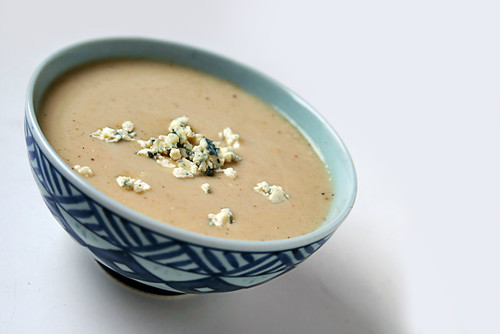
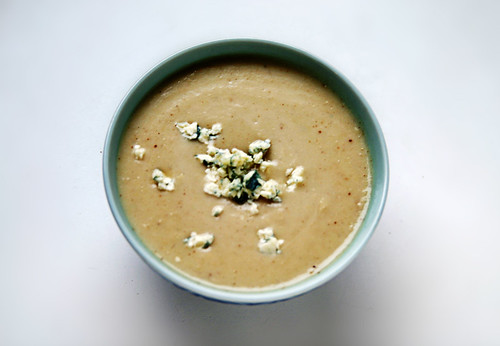
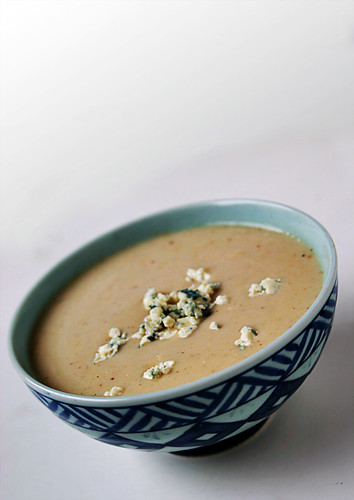
If I haven't scared you off with the blunt name and picture, let me just assure you that while not pretty, round or bacony, what these little spoonfuls (well, little and little, I may decide to go for teaspoons instead of soup spoons for forming them next time) of salmon pâté are is yummy and easy. And the sauce (not pictured - sorry about that!), which is really just a mixture of thick yogurt and ajvar relish, is a perfect contrast to the crisp, super-salty strips of smoked salmon. I'll probably develop this recipe further on my own (some capers or maybe a roasted bell pepper thrown in the salmon batter would not have gone amiss, I think) but they were very nice in this plain version, too.

Salmon Blobs

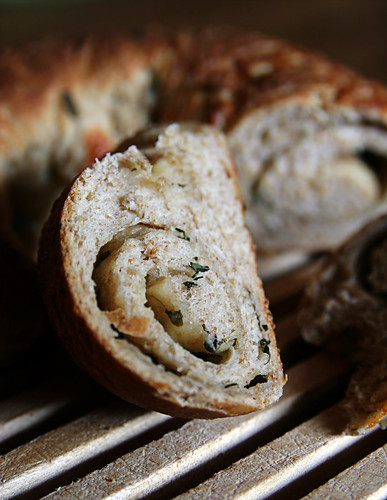
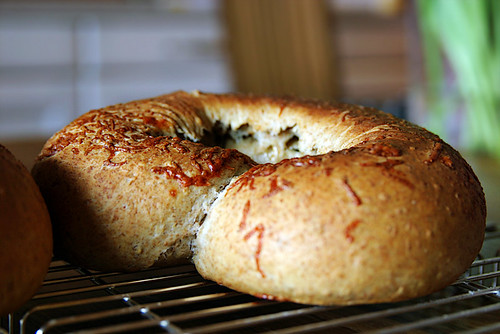
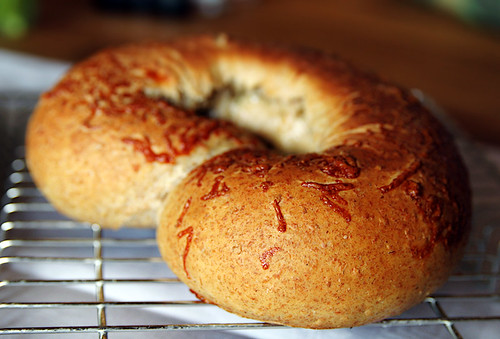
Expect a post on bagels in the not-too-distant future. ;)

Salmon Blobs with Bell Pepper Sauce
from Hufvudstadsbladet 29.3.07 (The Easter food article was fabulous, there will definitely be more featured here.)

300 g salmon fillet
1 egg
2 tsp sambal oelek
125 ml light cream (recipe called for 250 ml, but I'm pretty sure that would have left me with a soupy batter)
salt & pepper

150 g thinly sliced cold-smoked salmon

for the sauce:
300 ml yogurt (I used 250 ml super-thick Turkish yogurt)
3 tbsp ajvar relish (ours was mild and worked very well, which is not to say the hotter versions wouldn't)
salt & pepper to taste

Cut the salmon fillet into chunks (and remove bones if it has any), then mix in a blender with the egg and spices until you have a smooth paste. Drizzle in the cream and blend well. Let rest in the fridge for at least half an hour.

Bring a large pot of lightly salted water to the boil, then drop balls of the salmon paste into it (with the help of two spoons) and let simmer for about 10 minutes, turning about halfway through.

Meanwhile, cut the smoked salmon slices into 2-cm strips and fry (in a dry pan) until crisp on both sides. (My salmon turned out to be pretty thickly sliced, which is not something you can do much about when you notice it ten minutes before the rest of the meal is ready. Thinner slices would have made for easier/prettier assembly, but we don't really care about such things. Do we?)

For the sauce, if you're using regular yogurt, drain it for an hour or so, then mix with the ajvar relish and heat gently. Season with salt and pepper to taste.

Fish out the fish blobs with a slotted spoon, top each with a strip or two of crisp salmon, and serve with the sauce.

Recipe after the jump!

Friday, March 30, 2007

Pasta with Asparagus and Shrimp

Pasta with Asparagus and Shrimp


Depending on where you live, you may already be sick to death of asparagus, but over here I've just barely started finding decent ones. And I always knew that the first batch would go to this, a recipe my mom came upon sometime last year.

I've always found boiling asparagus to be incredibly tricky - the timing between just right and eeww, mushy has always been a problem - especially as you need to time whatever goes with it accordingly. Grilling and roasting is somehow less fussy, and in this recipe the asparagus is actually fried in a bit of butter until tender (and maybe a bit browned, yum), then mixed with parmesan, shrimp and a creamy lobster sauce.

Pasta with Asparagus and Shrimp


The lobster fond I use (and that the recipe called for) is a bought concentrate (Touch of Taste, anyone?), but I'm sure if you're the kind of person who makes his/her own stock, shrimp/lobster/crayfish stock would work even better. Just beware that the amount called for here is undiluted concentrate and adjust accordingly.

Pasta with Asparagus and Shrimp
originally from Hufvudstadsbladet, I've upped the wine a bit and reduced the lobster fond
1 pound (500 g) shrimp (or however much unpeeled shrimp it takes to make one pound, er, shrimp)
2 pounds (1 kg) fresh green asparagus
2 tbsp butter
1 cup (250 ml) grated parmesan
1.5 cup (350 ml) crème fraîche (I used low-fat, but make sure it's a type that doesn't separate when heated)
½ cup (120 ml) dry white wine
3 tbsp concentrated lobster fond/stock
pinch of cayenne
flat-leaf parsley, chopped

Cut the asparagus into slanted slices, about half-inch long. Brown the butter slightly and fry the asparagus for a few minutes, stirring constantly. Set aside and stir in the grated parmesan.

In a separate pan, bring the crème fraîche, lobster fond and wine to a boil and let simmer gently for five minutes. Season with cayenne, mix in the shrimp. Keep on the stove just until the shrimp's heated through, then mix with the asparagus and parsley and serve immediately with pasta.

Serves 3-4.

Recipe after the jump!

Monday, March 26, 2007

Leftover Tuesday #3: Carroty Karelian Pasties

(Porkkanakarjalanpiirakat/karelska piroger med morot)

Karelian carrot pasties

Leftover Tuesdays is one of my favorite food blog events, mostly because I get to see other bloggers being way more inventive than I am. You see, normally I have no problem with leftovers staying just the way they are - I can quite happily eat chicken korma three nights in a row without doing anything to spiff it up. So making something new from an already-prepared dish is something of a challenge - it's not how I'm used to thinking about things.

Karelian carrot pasty w/egg

And this time, strictly speaking I'm probably cheating. I made carrot casserole last week, deliberately leaving part of the carrot puree-rice mix to make Karelian pasties from later. Karelian pasties are very ubiquitous Finnish mini-tarts, I guess - you can get decent ones in any grocery store, anywhere. They're eaten for breakfast or as a snack, either plain or topped with sandwich-fillings or, as tradition dictates, eggy butter. The crust is basically rye flour and water, the filling rice porridge or pureed root veggies (potato being the most common), or a mixture of the two.

Karelian carrot pasties

The pleated construction of these looks very fussy, I know, but I've never found it the least bit difficult (and I only made Karelian pasties for the first time last summer). The trick is to keep both the pasty dough and the filling fairly dry - I cook the hell out of my rice porridge for this, until it's mostly solid. I usually make a whole bunch of them all at once and freeze most of them raw, to be popped into the oven when needed, but that's not to say they make a convenient fast snack - once the pasties come out of the oven, they need to be brushed with milky butter and then kept in a cloth-covered bowl for a while to soften the crust.

Karelian Pasties

Rice filling
250 ml (1 cup) water
250 ml (1 cup)rice (the kind you'd use for rice pudding)
1000 ml (4 cups) milk
1 tsp salt

Bring the water to a boil, add the (rinsed) rice, let simmer until the water's absorbed. Add the milk, crank up the heat until it's back to simmering, then lower the heat to an absolute minimum and let simmer, mostly covered, until the milk's absorbed and you have a thick goopy porridge. Season with the salt and let cool.

Optionally, boil some root veg, puree it, and mix with the rice. Or use up leftover mashed potatoes. (Do people ever actually have leftover mashed potatoes? I find it to be one of those dishes where I could mash four pounds of potatoes for four people and still have an empty bowl at the end of the meal. Maybe we just like our mash...)

The filling-to-dough ratio seems to depend more on the phases of the moon, stars, and Finnish cross-country world cup placements than any actual grams and milliliters. Since the dough is just flour and water, I usually make another batch of it if I run out before all the filling's gone and then just throw away the leftovers.
Pasty dough
250 ml (1 cup) rye flour
100 ml (3 fl oz) water
1 tsp salt
butter and milk, a few tbsp each

Mix the flour, salt and water. It should become a pretty dry dough - the amount you'll need depends a lot on how coarse your flour is. I had some very fine rye flour (ruissihti/rågsikt) this time, but I actually prefer the normal coarseness, even though you can't roll it out as thinly. (In fact, I rolled mine so thin this time that the pleated edges kind of scorched before the filling had set. Don't do that. The pictures I'm linking to instead of showing here are from last summer; those pasties were perfect.) Either way, it shouldn't feel moist when you squeeze it between your fingers. Once you've worked it into a cohesive, dry dough, roll it out as a log and cut into twelve pieces.

Roll out the pieces, one by one, to thin ovals. (I'm told a pasta maker comes in handy, but haven't tried it myself.) You'll want to make sure the pasty doesn't stick to your work surface, or to the rolling pin, so make sure both of those are floured, and keep moving the dough around while you're rolling it. It's a bit annoying to have spent time rolling out the perfect crust only to realize it's stuck to the table. Not that I'd know about such things, obviously.

Once you have your thin oval pastry shell, fill it with a good dollop of filling, spread it out to about an inch (probably a bit less) of the edges, and fold up the edges in soft pleats like so. Personally I like filling mine one by one before rolling out the next piece, but you could stack the rolled-out shells under a towel or something so they don't dry out.

Anyway, once you have all your pasties filled and pleated, heat your oven to as hot as it will go and bake for 10-15 minutes, until the filling looks dry and has taken on some color.

Brush the shells with a mixture of milk and melted butter (about half-and-half) and stack the pasties in a bowl (with kitchen towels or something between layers) and cover with a tea towel. This is so the shells will soften.

Eat as is, or as an open-faced sandwich, or with egg butter, which is about equal amounts softened butter (or margarine, even reduced-fat) and chopped hard-boiled eggs with (optionally) some chives mixed in.

Recipe after the jump!

Saturday, March 24, 2007

Carrot Casserole

(Porkkanalaatikko in Finnish, morotslåda in Swedish)

carrot casserole

This is really a Christmas dish, and about as traditional as you can get. I started thinking about it when I read about the Finnish food blog challenge for this month and just couldn't let go, because I've never made it myself - my grandmother and aunt both bring their own versions to Christmas Eve dinner, so there hasn't been any need. It's filling, slightly sweet (to go with the salty ham that people usually have for Christmas), a bit mushy and ultimately just a great comfort food.

carrot casserole

We had ours with sauteed brussels sprouts and bacon. (Mmm, bacon.) I could also have gone for (don't laugh) canned petits pois and some sort of gravy, but I got voted down. It made me miss all the snow, not that we had any last Christmas.

carrot casserole

There are some variations to what I consider the basic recipe, as presented here: sometimes the carrot isn't boiled and pureed but finely grated, and sometimes other grains, namely barley, are used instead of the rice. Obviously those are healthier versions, and I do like the nuttiness and texture of barley, but for me the rice-and-puree edition is The One.

carrot casserole


Carrot Casserole
150 ml (5 fl oz) short grain rice
150 ml (5 fl oz) water
600 ml (2½ cups) milk (I used 1.5%, but you could go for whole)
1 kg (2 lb) carrots
1½ tsp salt
200 ml (scant 7 fl oz) whipping cream
3 tbsp dark syrup (or molasses, I guess)
2 eggs
ground white pepper
freshly grated nutmeg
breadcrumbs
butter

Bring the water to a boil in a large-ish pan. Add the rice and stir until the water dissolves. Pour in the milk and bring to a simmer, stirring frequently. Boil on a very low heat, covered, until the rice has been absorbed and a thick, smooth porridge has formed. (This takes quite a while, maybe 45 minutes or so.)

Meanwhile, chop the carrots coarsely and boil in a bit of water until they're very soft. Drain and return the pan to the stove until the carrots are completely dry. Puree and mix with the rice, syrup and spices.

Once the rice and carrots have cooled enough that they won't cook the eggs on contact, add those and stir to blend. Whip the cream and fold it in gently. Transfer to one or two buttered, oven-proof casserole dishes. (Ramekins are cuter, but I think it's better made in a large dish.) Sprinkle with enough breadcrumbs to cover and dot with butter. Bake at 175°C (350°F) for about an hour and a half, until it's set, puffed and golden.

carrot casserole

Recipe after the jump!

Friday, March 23, 2007

Roasted Cauliflower & Blue Cheese Soup

A while ago, I made this cauliflower/blue cheese soup that turned out really well. I didn't blog about it because it was too dark to take pictures and there weren't enough leftovers to do it justice afterwards. (I guess I could have photographed it in a spoon or something. How come I never come up with these genius ideas when they're needed??)

Roasted Cauliflower & Blue Cheese Soup

Anyway, then I read about Anne's roasted cauliflower soup, remembered that roasting makes cauliflower the Best Thing Ever, and decided to do things a bit differently this time. (Unfortunately "differently" also involved a bad burn on my hand. Boo! But not so bad as to mar my enjoyment of this fabulous soup.)

If you're not into blue cheese, 1) you may like this anyway, although 2) it'll probably be fine even without it, as there's rather a lot going on: roasted cauliflower and garlic, and dashes of sherry, nutmeg and worcestershire sauce (I can never tell if I've spelled that right) adding a bit of depth. I personally really like it with a base of chicken stock and thickened with a roux, but switch to vegetable stock and throw in a potato or two to thicken things up if you're looking for something more healthy and/or vegetarian.

Roasted Cauliflower & Blue Cheese Soup


Roasted Cauliflower & Blue Cheese Soup
2 heads cauliflower, about 1200 g total (2½ lb)
4 smallish onions
3 stalks celery
8 cloves roasted garlic*
1 tbsp butter
2 tbsp flour
1 l chicken stock (4 cups)
200 ml light cream (needs to be the kind that doesn't separate from heat, over here we have something called "food cream") or non-nonfat milk
4 tbsp dry sherry
1 tsp worcestershire sauce
½ tsp freshly grated nutmeg
100 g (3½ oz) blue cheese, crumbled
white pepper (and salt, at least if you're not using the cheese) to taste

*I roast several whole heads of garlic wrapped in foil (in a low heat) until very very soft, then press out the innards, mush them up, and put them in an ice cube tray that I pop in the freezer. Once the garlic cubes are frozen solid, I transfer them to a ziploc bag. After which I just throw in a frozen cube of soft-flavored garlicky goodness into whatever stew-type thing I'm making.

Cut the cauliflower into florets, toss in a bit of olive oil and spread out in a large pan. Peel the celery (I find this cuts the harsh taste some people dislike) and chop them fairly finely. Cut the onion into chunks. Toss onion and celery (+ garlic if you don't have pre-roasted) with a bit of olive oil and wrap in foil.

Roast both cauliflower and onions at 175°C/350°F until the cauliflower's soft and slightly browned, stirring a few times so it doesn't stick too badly. (If possible, avoid burning your hand in the process. Ouch.)

Once the cauliflower is ready, melt the butter in a large pan until it's all bubbly. Add the flour and stir for a few minutes, then add, still stirring, cauliflowers, onions and garlic and (hot) chicken stock. Season with sherry, worcestershire sauce and nutmeg, cover, and let simmer for about 20 minutes. Puree in a blender (in batches) until very smooth, then return to the pan and add cream/milk and cheese. Stir on a low heat until the cheese has melted. Check the taste and add pepper and salt if needed.

Roasted Cauliflower & Blue Cheese Soup

Recipe after the jump!

Thursday, March 22, 2007

Tomato Tart with Bacon and Red Onion

It's probably only fair to warn you that the tart I'm going to describe possesses some strange powers. Namely, it robs people (read: me) of all self-control. The night we had this, it was too dark to take pictures. The only thing that kept me from downing the whole thing, in spite of not being the least bit hungry, was knowing how much butter went in the crust.

tomato tart

The following day I cut out a slice to take out and photograph (trimming a bit off the edges because it didn't quite look right), snapped a few pictures that turned out to be all out of focus and weirdly lighted, and promptly wolfed down the subject. The day after that, I was at home with my trusty lampshade-cum-lightbox and interfering felines, snapped a few shots of the last slice and... suddenly... through no conscious decision... ate it up.

tomato... oops.

Possibly I'm just telling you that, like grocery shopping, food photography is best left to when you're not hungry.

This tart owes a lot to Molly's Roasted Tomato Tart with Crème Fraîche and Thyme, in the way that that was what I was going to make, to the letter, until I discovered my tomatoes were a bit sad and felt the need to add something to the mix. Namely bacon, onions and balsamic vinegar.

I was also making it in the wilds of, er, the place where we have our vacation home and no internet, and had a crust recipe calling for sticks of butter which is just one of those things I haven't yet learned conversions for, so the shell is improvised. I would also like bonus points for making said shell without the benefit of a mixer and freezer, which is how I usually survive the trauma of crust-making. Incidentally, it was also the flakiest crust I have ever managed to produce. Maybe I'll have to eschew the mixer in the future. (EXTRA bonus points for doing the cleanup without running water.)

tomato tart

Anyway, it was yummy, as things containing stuff like bacon, onions, tomato and cheese tend to be, especially when encased in a ton of buttery crust, and I'm sure it would be very acceptable even without the bacon if you want to go the vegetarian route.

Tomato Tart with Bacon and Red Onion
for the crust:
100 g (3½ oz) of cold, lightly salted butter, cut into small cubes and then chilled
250 ml (8½ fl oz) all-purpose flour
3 tbsp ice-cold water

for the filling:
about 700 g (1½ lb) tomatoes
1 tbsp fresh thyme, chopped
50 ml (1.6 fl oz, or 3 tbsp + 1 tsp) olive oil
3 cloves garlic
3 slices bacon, finely chopped
1 tsp balsamic vinegar
1 medium red onion, sliced
2 tbsp crème fraîche
2 tsp dijon mustard
150 ml (5 fl oz) grated gruyère

Put the flour in a bowl and top with the butter. With the tips of your fingers (it helps if your hands are cold from, um, the cold), work the butter into the flour until it's all almost cohesive. Part crumble, part paste. Add the water and stir gently with a fork until the dough starts coming together (this is like three or four swirls). Dump the dough on a piece of clingfilm and bring it together with your hands to form a ball, then press down to a disc. Cover with the clingfilm and refrigerate overnight.

Halve and deseed the tomatoes. Toss with the thyme, olive oil and some salt, then arrange on a baking tray, cut side down. Bake for half an hour at 175°C (350°F), remove from the oven and let cool until you can handle them, then remove the skins. (Note: this was a pain, and I wonder if blanching and peeling before the baking wouldn't be easier.) Turn the tomatoes cut-side up and sprinkle with garlic, bacon, balsamic vinegar and the onion. Bake for 40 minutes.

On a piece of lightly floured parchment paper, roll out the dough. Transfer to a 27-cm (10-inch) pie pan (I do this by taking parchment and dough to the pan, inverting the whole thing and letting the dough rest on the edges of the pie pan, and peeling off the parchment paper) and chill until the tomatoes are done in the oven, then cover with tin foil and weigh down with beans. Bake, still at 175°C/350°F, for about 30 minutes, remove the tin foil and bake until the shell is pale golden. Mix together crème fraîche, mustard and cheese and spread over the bottom of the shell. Arrange the tomatoes in the pan (in flat layers, not just tossed around) and bake for half an hour.

Recipe after the jump!

Monday, March 19, 2007

Inkiväärikuorrutetut porkkanamuffinit (Ginger-Frosted Carrot Cupcakes)

This is my entry for the Finnish food blog challenge for March, hence the bilingual post. There's a full recipe in English after the jump as usual.

ginger-frosted carrot cupcakes

Lakkarahka vaihtaa nyt hetkeksi kieltä tai ainakin tilapäisesti kaksikielistyy maaliskuun ruokahaasteen kunniaksi. Suolaisia porkkanaruokia kävi mielessä yksi jos toinenkin haastetta miettiessäni - porkkanalaatikkoa en ole itse koskaan tehnyt, ja porkkanaiset karjalanpiirakatkin houkuttelevat (lisäys: itse asiassa laatikko ja piirakat tulikin jo tehtyä) - mutta sitten iski niin armoton porkkanakakkuhimo ettei sitä oikein voinut vastustaa.

ginger-frosted carrot cupcake

Kutsun näitä nyt muffineiksi kun ei sopivampaa sanaa tule mieleen, mutta oikeastihan nämä ovat päivänselvästi cupcake-ejä - kakkuja minikoossa ja vielä kuorrutettujakin. Periaatteessa taikinan voisi paistaa parissa pyöreässä kakkupohjassa ja tehdä kuorrutuksesta sitten oikein kerroskakku (ehkä appelsinimarmeladilla höystettynä?), mutta itse olen kovasti ihastunut näihin annoskokoisiin leivoksiin. Ne kun ovat järjestään niiiiiin söpöjä. Maunkin puolesta olen näihin aikalailla tykästynyt; ne ovat yllättävän kevyttä kamaa (sekä rakenteeltaan että rasvasisällöltään) ja juuri sopivan mausteisia.

ginger-frosted carrot cupcake

And now for the English version:

When thinking about the food challenge, the topic of which was carrots, I touched upon several savory ideas like traditional carrot casserole, which I've never made, or Karelian pasties with carrot filling - and I'm fairly certain both of those will get made sooner or later (ETA: sooner, as it happens. Read about the casserole here and the pasties here.) - but then I was struck by a craving for carrot cake, and that was pretty much that.

ginger-frosted carrot cupcake

I love these cupcakes - for one thing, they're amazingly light (in texture, and fairly light in terms of calories as well) with just the right degree of sweetness and spicyness. I think the batter would work just as well as a whole cake, but cupcakes are cuter, and also you feel less like a pig eating three cupcakes than devouring an eighth of a cake. Not that I'd know about such things, but anyway.

ginger-frosted carrot cupcake


Inkiväärikuorrutetut porkkanamuffinit
24 keskikokoista muffinia
500 g porkkanaa
2,5 dl kookoshiutaleita
2,5 dl saksan- tai pekaanipähkinöitä rouhittuina
2 dl fariini- tai tummaa muscovadosokeria
5 dl vehnäjauhoja
2 tl kanelia
1 tl jauhettua inkivääriä
1 tl suolaa
¼ tl kutakin muskottia, neilikaa ja maustepippuria
2 tl ruokasoodaa
1 tl leivinjauhetta
3 kananmunaa
2,5 dl sokeria
1,5 dl ruokaöljyä
1 pieni (227g) purkki ananasmurskaa valutettuna

Pilko puolet porkkanoista hienoiksi kuutioiksi ja keitä pikkutilkassa vettä oikein pehmeiksi. Survo sauvasekoittimella muusiksi, anna jäähtyä. Raasta loput porkkanoista suht pieneksi silpuksi (ei sillä raastinraudan isoimmalla puolella).

Paahda ensin pähkinät ja sitten kookoshiutaleet kauniin kullanruskeiksi - varsinkin kookoksen kanssa saa olla tarkkana ettei se kärtsää. Anna jäähtyä.

Sekoita keskenään jauhot, pähkinä, kookos, mausteet, leivinjauhe ja ruokasooda sekä fariinisokeri. Vatkaa munat ja sokeri kuohkeiksi, sekoita joukkoon öljy, porkkanat ja ananasmurska. "Kääntele" märät ainekset kuiviin. Paista 200:ssa asteessa 15-20 min.

Kuorrutuksen kanssa minulla oli senverran ongelmia että annan vaan sinnepäin-ohjeen; ilmeisesti syntipukkina oli light-philadelphia josta ei meinannut saada järkevää laisinkaan. Mutta jotakuinkin näistä lähtökohdista aloitettiin:

300g Philadelphia-juustoa
4 rkl voita huoneenlämmössä
1 rkl rouhittua inkivääriä
tajuton määrä tomusokeria (yli 500g)

Sekoitetaan tomusokeria lisäten kunnes kulhossa on kuorrutkseen soveltuvaa, aika kiinteää mönjää. :P Käytännössä kannattaa vatkata voi pieneen Philadelphiamäärään, sitten lisätä loput juustosta ja inkivääri, ja lopuksi tomusokeria pari desiä kerralla. Jos *kröhöm* tomusokeri loppuu kesken ja menee hermo, voi sitä koittaa kiinteyttää yön yli jääkaapissa.

Koristele muffinit kuorrutuksella. Itse lisäsin vielä lopuksi reunoille paahdettua kookosta ja pähkinää, mutta suoraan sanottuna se nyt oli vaan turhaa fiineilyä. Itse asiassa nämä menettelevät ihan hyvin ilman kuorrutustakin, ja paljaina ne voikin hyvin pakastaa. (Sulatus ensin jääkaapissa ja sitten hetki uunissa, ainakaan omilla mikronkäyttökyvyilläni ei niistä syötäväksi kelpaavia saa.)

Ginger-Frosted Carrot Cupcakes
makes 24 medium-sized cupcakes
500 g (1 pound) carrots
250 ml (8½ fl oz) dried coconut
250 ml (8½ fl oz) walnuts or pecans, chopped
200 ml (6¾ fl oz) brown sugar
500 ml (17 fl oz) all-purpose flour
2 tsp cinnamon
1 tsp dried ginger
1 tsp salt
¼ tsp each nutmeg, cloves and allspice
2 tsp baking soda
1 tsp baking powder
3 eggs
250 ml (8½ fl oz) caster sugar
150 ml (5 fl oz) vegetable oil
1 227 g (8 oz) can crushed pineapple, drained

Chop half of the carrots finelly and boil in a bit of water until very soft. Grate the rest of the carrots finely.

Toast the nuts and coconut flakes in a pan until golden and fragrant (I'm a wuss and did them separately, because I was afraid of burning the coconut); set aside to cool.

In a large bowl, mix flour, nuts, coconut, baking powder and baking soda, spices and the brown sugar. Whip caster sugar and eggs in another bowl until light and fluffy; add the vegetable oil, pineapple and carrots and mix well. Fold the wet ingredients into the dry and spoon the batter into muffin tins. Bake at 200°C (400°F) for 15-20 minutes, cool on racks.

I had huge problems with the frosting, so I don't really want to give out the recipe (is there something about light cream cheese that makes it extra-runny?). For the consistency I wanted I would have needed a metric tonne of icing sugar, but as it was, I kind of gave up just when it was starting to get borderline-sweet but still remained a bit runny. The fresh ginger gives it a terrific bite, but I don't want it to drown in the sweetness!

Anyway, the formula I went by was pretty much like so:
300 g (1/3 lb) cream cheese
4 tbsp softened butter
1 tbsp grated ginger
lots and lots and lots of icing sugar. More than 500g/1 lb.

Er, you mix them together. Duh. I decorated with some more toasted chopped nuts and coconut, mostly to hide the runniness of the icing.

Recipe after the jump!

Thursday, March 15, 2007

Hay, Hay, It's... Um, My Mother's Birthday

Here's the deal: I don't really do innovative in the kitchen. At least not when I'm baking. I'm OK with trying anything, no matter how weird, as long as I have A RECIPE OMG, but stick me with a general theme and a request to "come up with something interesting" and you'll find me tearing out my hair in desperation. HOWEVER, for my first ever Donna Day, I was going to change all that. I was going to boldly go where, OK, others had probably gone before, but I wouldn't follow on purpose.

Mocha-Orange Cheesecake

Except... it's my mother's birthday. My mother wanted cheesecake for her birthday, which was fortuitous as I couldn't justify baking two cakes in a single week. My mother wanted chocolate orange cheesecake. (My mother is probably getting tired of being namechecked in this here blog, and in such a disparaging manner. Can I tell you about the fabulous pork she made for our family lunch on Sunday? It was fabulous! And pork! Which is a meat!) And like the creature of habit I am, I just took a tiny peek at epicurious and just happened to search for "cheesecake," "orange" and "chocolate" - I swear it was an accident! - and found... this Mocha-Orange Cheesecake. And that, as they say, was that.

Orange-Mocha Cheesecake

Now, once I have a recipe, I'm perfectly fine with tinkering. For one thing, I wouldn't know a Pepperidge Farm Orange Milano cookie if, er, I bit into it, although chances are I would like it really a lot. I'm also not sure where I'd ever find frozen juice concentrate, and my booze collection pretty much consists of cooking sherry, and I didn't feel like tinkering about with forgot to buy sour cream. So really, I couldn't actually follow the recipe at all. Still, it was Mocha-Orange or nothing.

Mocha-Orange Cheesecake


I'm always surprised when something I do without a set recipe turns out fabulous, and this totally did (even if I had some, er, issues with construction). The crust is wonderful, the cheesecake layer fresh and intensely orange-y, and the ganache faintly coffee-flavored and fairly sweet. In fact, if you make this without the ganache you may need to up the sugar in the actual cake a bit. (Yes, that is a Moomin spoon. Do you know how long I've waited to post a recipe displaying my Moomin spoons? Longer than I've had this blog, that's how long!)

Layered Blotched Marbled Mocha-Orange Cheesecake

for the crust
150 g (5½ oz) crushed chocolate chocolate chip cookies
grated peel of one untreated orange
1 tbsp cocoa powder
1 tbsp sugar
50 g (1¾ oz) butter, melted

for the cream cheese
250 g (9 oz) mascarpone cheese
400 g (14 oz) cream cheese (Philadelphia)
4 eggs
130 g (4½ oz) sugar
juice and grated peel of one orange
1 tsp instant espresso powder
50 g (1¾ oz) dark chocolate

for the ganache
240 g (8½ oz) dark chocolate
200 ml (6¾ fl oz) thick cream
2 tsp instant espresso powder
250 ml (1 cup) icing sugar

Whizz together the ingredients for the crust and press into the bottom of a springform pan (mine is 23 cm (9 inches) in diameter, but a smaller one would probably yield a prettier result). Bake at 175°C (350°F) for about ten minutes, let cool.

Mix the cheeses until smooth and, er, mixed. Add sugar, orange juice & peel and the eggs, whisk until combined.

Melt the chocolate for the cake in the microwave. Add 1 tsp espresso powder and about a third of the cheese/egg mixture, blend well.

Pour about half of the plain cheese mixture in the springform pan, then gently spoon over the chocolatey cheese. The plan here was to go for layers, but of course the chocolate mixture was much less runny than the plain orangey one, so that totally didn't work out. If you feel strongly about layers you could probably bake the bottom plain layer for a while, until it firms up a bit, then add the chocolate and top with the rest of the plain orange layer, but I did not have the time for that crap, so settled for dumping blips of chocolate in the pan, topping with the rest of the orange, and finally running a knife around the thing for a marbled effect.

Bake in a bain marie (wrap your springform pan in foil first!) at 150°C (300°F) for 50 minutes, turn off the oven and leave the cake there to cool.

For the ganache, heat the cream until almost boiling, the pour over the (chopped) chocolate and espresso powder, let stand for a minute and mix to combine. Blend in the icing sugar and let cool. Once it's thickened, whip until dense and fluffy and decorate pipe on top of the cake.

Mocha-Orange Cheesecake

Recipe after the jump!

Rolls with Crunchy Bits and Rosemary

Rolls with Crunchy Bits and Rosemary

I spotted these fabulous-looking rolls (buns? whatever) in the Swedish food blog Ett öppet fönster and knew I had to try them - I love throwing seeds and stuff in bread doughs, and the preparation method for this is somewhat unusual: you take the crunchy bits - flax- and sunflower seeds, coarse rye flour and wheat bran - and douse them in boiling water, let the thing stand for an hour, and then add the flour, yeast &c.

I didn't have all the stuff called for and didn't feel like further overcrowding my flour pantry, so I did some substitutions, and also had a few sprigs of rosemary threatening to wilt, so there are some differences between this and the original. I'm sure both are equally fabulous, though, and you can vary the seeds and brans according to what you have on hand (sesame pumpkin, anyone?).

Rolls with Crunchy Bits and Rosemary


Rolls with Crunchy Bits and Rosemary
adapted from Ett öppet fönster, makes 24 rolls

150 ml (5 fl oz) whole wheat flour
100 ml (scant ½ cup) oat bran
100 ml (scant ½ cup) linseed (also known as flaxseed)
100 ml (scant ½ cup) sunflower seeds
2 tbsp olive oil
2 tsp salt
400 ml (about 1¾ cup) boiling water

50 g (1¾ oz)fresh yeast
350 ml (1½ cup) lukewarm water
100 ml (scant ½ cup) honey
1 tbsp finely chopped rosemary
1300-1500 (5½-6 cups) ml bread flour

Mix the first seven ingredients in a very large bowl. Cover with clingfilm and let stand for an hour.

Dissolve the yeast in the water and add to the seed porridge (which is totally meant to look disgusting at this point) together with the honey, rosemary and most of the flour. Knead until you have a soft, springy dough (adding more flour as necessary), about ten minutes by hand.

Cover with a floured kitchen towel and let rise for three hours. (Note: this is a huge, gigantic dough. It makes a lot of buns. When I make it again, I'll probably halve the recipe. I mention this because I had to leave my dough to rise on the table - I didn't have a bowl large enough to hold it.)

Gently deflate the dough and knead it a few times. Cut into 24 pieces and form into rolls. Let rise on a baking sheet until doubled, 30-45 minutes, then bake at 200°C (400°F) for about 15 minutes.

I had mine with some cream cheese and garden cress - the first thing I've managed to grow from scratch since I got my Boss Cat five years ago. Whee!

Recipe after the jump!

Monday, March 12, 2007

A Healthy(er) Snack

roasted chickpeas


I'm a girl who likes to munch on things. You know those diet quizzes where you're asked about your weaknesses - is it chocolate, salted nuts, cheese, candy, potato chips? Surely I can't be the only person whose instinctive response to this question is "um, yes, ALL OF THOSE, gimme!"

Luckily (for me, that is), I also like chickpeas. Specifically, crunchy-on-the-outside, tender-on-the-inside, nutty and fragrant roasted chickpeas.


Spiced Roasted Chickpeas


Indian Roasted Chickpeas
I feel silly calling a recipe, because there's really nothing to it (plus I didn't exactly measure anything, so you'll have to go by feel with the spices - not that you shouldn't, anyway). Nevertheless...

1 can chickpeas (or you could soak and cook your own)
1 tbsp olive oil
whatever spices you fancy: I used turmeric, ground cumin, amchoor powder, cayenne, a dash of garlic powder and salt & pepper
Rinse and drain the chickpeas. Mix oil and spices and toss the chickpeas in them to coat. Roast in a large-ish pan at 200°C (400°F) for 20-35 minutes, until crisp and golden brown, stirring a few times in between.

Eat warm.

Spiced Roasted Chickpeas

Recipe after the jump!

Friday, March 9, 2007

Roasted Tomato, Chickpea & Red Onion Salad with Halloumi

Sometimes the title just says it all, you know? I feel like there's nothing I can do to sell this salad after giving you its (very prosaic) name. It should be enough! Well, maybe I'll just add that it's really no work at all - the onions and tomatoes are roasted in a mixture of balsamic vinegar and olive oil until the tomatoes start crinkling at the edges and the onion turns soft and sweet. After that it's just a question of tossing things together and frying the halloumi.

Tomato, Chickpea and Onion Salad

I have this sneaking suspicion that halloumi is a bit 2002 (for one thing, I can get it at my corner store* which is probably not a good sign), but quite frankly, I don't care. Fried halloumi is one of the best cheese-related experiences you can have, soft and oozy and salty and crisp and tangy. And I say this as someone who loves her cheese.

Roasted Tomato, Chickpea and Red Onion Salad with Halloumi


*even low-fat. Trust me when I say that low-fat halloumi is the devil.

Roasted Tomato, Chickpea and Red Onion Salad
serves 3-4, originally snagged from Hufvudstadsbladet last fall but tinkered with a bit

500 g (1 pound) cherry (or smallish plum) tomatoes
2 red onions, thinly sliced
1 can chickpeas
1½ tbsp balsamic vinegar
1 tbsp extra-virgin olive oil
salt & pepper
fresh basil, oregano and tarragon or any combination thereof
200 g (7 oz, or whatever size it comes in, really) halloumi
salad greens

Tomato, Chickpea and Onion Salad

Halve the tomatoes and bake at 200°C (400°F) for about ten minutes. Season the onion with balsamic vinegar, a bit of olive oil, salt and pepper, and sprinkle over the tomatoes. Bake for another 10-15 minutes, until the onion's softened and maybe taken on some color, and the tomatoes are starting to crinkle at the edges.

Mix the onions and tomatoes with the rinsed and drained chickpeas and coarsely chopped herbs. Taste off with more balsamic vinegar and/or salt & pepper.

Cut the halloumi in 5-mm slices and fry it on both sides in a dry pan until golden brown.

Serve on a bed of whatever green stuff you have around. Except not the romaine from my fridge, because that had gone all wilty. Boo.

Tomato, Chickpea and Onion Salad, with Help

Recipe after the jump!

Thursday, March 8, 2007

Horseradish-crusted Salmon

I've been experiencing some setbacks cooking-wise lately: an apple pie that was quite tasty but extremely ugly (plus the crust really wasn't worth sharing) as well as a Caesar salad that was, to put it plainly, NASTY. Ugh, vinegar. In addition we've been working our way through some leftover roast beef (paahtopaisti), which is very good but doesn't make for very interesting meals (especially as I didn't actually make the roast - incidentally, my mother would like you to know that I'm a dirty rotten liar and she does too know how to cook meat).

Horseradish-crusted Salmon

But last night! I made the horseradish salmon I spotted in the Finnish food blog Keittokomerossa last week, and it was fabulous. I played around with the amounts a bit, making this a bit less horseradishy - there was a definite tang but nothing overpowering.

Horseradish-crusted Salmon


Horseradish-crusted Salmon
served three, with a bit of leftovers
700 g (1½ lb) salmon fillets, with skin
75 g (2½ oz) prepared horseradish
2 egg yolks
75 g (2½ oz) breadcrumbs
3 tbsp chopped fresh parsley
butter for frying

for the sauce:
250 ml (1 cup) light cream
½ tbsp Dijon mustard
25 g (1 oz) prepared horseradish (they come in tubes à 100 g here, so I just went by feel)
juice of one lemon
a whole lot of chopped chives
salt and pepper to taste

Cut the salmon into serving-sized pieces and remove bones. Salt lightly. Mix the horseradish paste and egg yolk on a plate and the parsley and breadcrumbs on another. Dredge the salmon, skin side up, first in the horseradish and then in the breadcrumbs.

Fry the salmon in a bit of butter, breaded side down, on a medium-hot pan, for about 3 minutes. Transfer to a baking tray, skin side down, and bake in the oven at 180°C (350°F) for 6-10 minutes, depending on the thickness of your fillets.

For the sauce, reduce the cream in a saucepan for a bit (I thickened it with a bit of cornstarch, but I'm not sure it was necessary, really). Add the rest of the ingredients and take off the heat before it comes back to the boil.

Horseradish-crusted Salmon

Recipe after the jump!

Saturday, March 3, 2007

Beer, Thyme & Cheese Spelt Bread

95% of you probably aren't aware, but Right Now, at This Very Moment (or at least until a very few moments ago, when I started writing this), the Nordic Ski World Championships are underway in Sapporo. What this has to do with a food blog? Well, it serves, at least partway (the other part being "yours truly is INSANE"), to explain how I got to getting a start on today's bread at 2.30 AM. You see, that's when they jumped the ski jumping part of the Nordic Combined. Ahem. (No, really. In some circles, this makes sense.)

Cheese, Thyme & Beer Spelt Bread

I needed to use up a half-empty bag of spelt flour (to make room for more flours), but of course what really caught my eye was the cheese part. Who doesn't love cheese? The recipe called for gruyère, which I didn't have, so I made do with the somewhat milder cheddar.

Cheese, Thyme & Beer Spelt Bread

Like a lot of my creations, this isn't, you know, perfect look-wise. I mean, the cheddar on top kind of looks like some sort of weird fossilized slugs or something, and also the jellyroll-type construction split in the oven, so you can see its cheesy, thyme-studded innards spilling out. But, mmm... cheesy innards! It was meant to go with a soup for lunch, but the first bread kind of disappeared while we were watching the ski jumping small hill competition. In fact, I'm not sure I have any room for lunch. But if I do, there's another bread for us to gobble up with it.

Cheese, Thyme & Beer Spelt Bread


Beer, Thyme & Cheese Bread
from Glorian ruoka & viini
200 ml (6¾ fl oz) beer
100 ml (3.3 fl oz) water
20 g (¾ oz) fresh yeast
1 tsp sugar
1 tsp salt
50 ml (1¾ fl oz, or 3 tbsp + 1 tsp) melted butter or canola oil
400 ml (13½ fl oz) wholemeal spelt flour
200-300 ml (7-10 fl oz) all-purpose flour
~200 ml (scant 1 cup) oat bran

filling
50 g (scant 2 oz) finely grated cheese (I used cheddarn)
3 tbsp chopped fresh thyme

topping
some more beer
30 g (1 oz) finely grated cheese


Dissolve the yeast in the water and beer. Blend in sugar, salt and melted butter. Work in the flours and oat bran a bit at a time and knead until you have a springy dough.

Let rise for about an hour at room temperature or for several hours in the fridge. Tip the dough onto a floured work surface and divide in two. Knead a few times to get rid of air bubbles.

Roll each dough-half to a rectangle of 35*20 cm (14x8 inches). Sprinkle with thyme and grated cheese. Roll up to a tight log and form the log into a pretzel-like knot.

Transfer the breads to a floured baking sheet and let rise, covered, for 30 minutes. Brush the breads with beer and sprinkle on some more cheese.

Heat the oven to 250°C (480°F) and mist with cold water just before putting in the breads. Lower heat to 225°C (440°F). Bake for 25 minutes, misting with more water a few times during baking.

Cheese, Thyme & Beer Spelt Bread

Recipe after the jump!

Friday, March 2, 2007

Chorizo Muffins

I feel like I've been cannibalizing my favorite Finnish food mag, Glorian ruoka & viini, in this blog. The reason for this is that I've started to go through my hyoooge piles of cut-out recipes to transfer them to my computer where I can keep them organized, and, well, a lot of them are from Gloria, as the recipes tend to be inventive but not too fussy.

Such as this Chorizo Muffin.

Chorizo Muffin

Yes, muffin. By the time I got around to taking pictures, there was just one left, which was a bit of a pity, as one really expects muffins to come in quantities larger than one. A seasoned reader may also notice I had some other problems while photographing this, too:

*sigh*

(Anyone know how to edit out cat tails from food porn? How about cat heads? This wasn't intended to be a weekend cat blogging post!)

dude, WHAT? is? THAT?

My favorite muffin is actually lemon poppyseed, but I haven't had one in years. Although now that I've started thinking about it this will probably need to be rectified like tomorrow. (Or maybe tonight. Lemon is good for a sore throat, right?) I'll probably find a fabulous new recipe from the roundup for the first-ever Muffin Monday, hosted by Elena.

Chorizo Muffins
adapted from Glorian ruoka & viini

makes 12 (can be halved, if you feel like halving an egg, which I did):
200 g chorizo, finely diced
3 tbsp chopped fresh parsley
1 tsp garam masala
½: tsp ground paprika
3 eggs
200 ml yogurt (the recipe calls for a cultured milk product called kermaviili - kesella in Sweden, but I don't think it exists in the US. I think you could use lowfat sour cream.)
50 ml olive oil
300 ml cornmeal
150 ml bread flour
2½ tsp baking powder
pumpkin seeds for decoration

If your chorizo is of the raw kind, saute it in a bit of oil. Season with parsley, garam masala, salt and paprika.

Whip the eggs, [cultured milk produce of choice] and olive oil in a mixing bowl. Mix flours and baking powder and sift into the egg mixture, fold to combine. Fold in the chorizo.

Spoon into muffin tins and sprinkle with pumpkin seeds. Bake at 200° C for 15 minutes. Serve warm.

Chorizo Muffin

Recipe after the jump!

State of the Onion + 5 Things Meme

I've been feeling a bit under the weather this week, so there hasn't been much interesting cooking going on. However, remember the onion from a few weeks ago? Well, I popped it in a glass of water, and it's only been batted out of it and nibbled on 3247 times (give or take), and, well:

red onion

(Yes, yes, raw onion is bad for cats. I haven't noticed them actually eating it - mostly the Clown Cat only wants to get at the water.)

I got tagged for the Five Things You Didn't Know About Me meme not once but twice this week, so I guess I should comply. However, since I only just started this blog there's probably not much you do know about me, so I'm going to go fairly easy here and concentrate on food-related stuff.

1. My first food obsession was blue cheese (Aura, to be precise). I'd just learned to crawl, my parents had guests over, and some cheese crumbled to the floor. I think they expected me to spit it out, but no, it was yummy!

I still like blue cheese, but not enough to eat it off the floor. Or so I like to tell myself.

2. For a while in my mid-to-late teens I was a vegetarian. I seem to have repressed most of this time in my life because try as I might, I can't recall when or why I started, or even what made me give it up (laziness most probably). Needless to say, I enjoy food a lot more now, both when it has meat in it and when it doesn't.

3. I hate raisins. Also, cold-smoked fish and tortellini, although the latter is mostly about finding them utterly boring, not off-putting. Even so, I consider myself the least picky eater in my family, mostly because my father's one prejudice (pineapples) is so virulent and UNREASONABLE. (Mom's are, among other things: raisins; goat cheese; celery. My brother's are the worst though: beans and lentils; Brussels sprouts; fish; shrimp; zucchini and eggplant.)

Except if you count the whole I-don't-drink-because-the-taste-of-alcohol-is-awful thing. Actually, it probably makes me lose this game right off the bat. I don't drink coffee, either.

4. I'm a messy cook. In fact, I'm a messy anything. (Except computer user. My files are always impeccably organized, at least until I burn them on a CD and promptly lose track of it.) It's not a proper meal unless I've used every last bowl and A LOT of cooking utensils. Also, I'm not one of those people who cleans up after herself as she goes along - once I'm finished (and most often after I've eaten) the kitchen looms as a huge wasteland of dirty dishes, piles of vegetable peel and empty cartons of what-have-you. Sigh.

5. I like eating at home about 4376 times better than at restaurants. Moreover, I like my own cooking better than other people's. This is probably some huge character flaw type thing, because it's not like I'm the best cook I know or anything.

Recipe after the jump!